
Step by step tutorial to designing state-of-the-art AR apps with Niantic Lightship ARDK for Android and iOS
Prerequisites
- Install Unity Hub
- Install Unity version 2020.3.2f1
- Download Niantic Lightship ARDK, Lightship Example Projects, ARDK Sample Mock Meshes, ARDK Mock Environments and Lightship Hub files
Optional
- Apple Developer Account and XCode (if you plan to create apps for iOS (You need to have a Mac also)
- Android SDK (if you plan to create apps for Android, this can be downloaded via Unity as well)
Step 01: Open Unity Hub
Step 02: Create a New Unity 3D/3D Mobile Project
- Go to Create -> New Project and select the 3D (or 3D Mobile) template.
- Give a project name and click the "Create project" button.
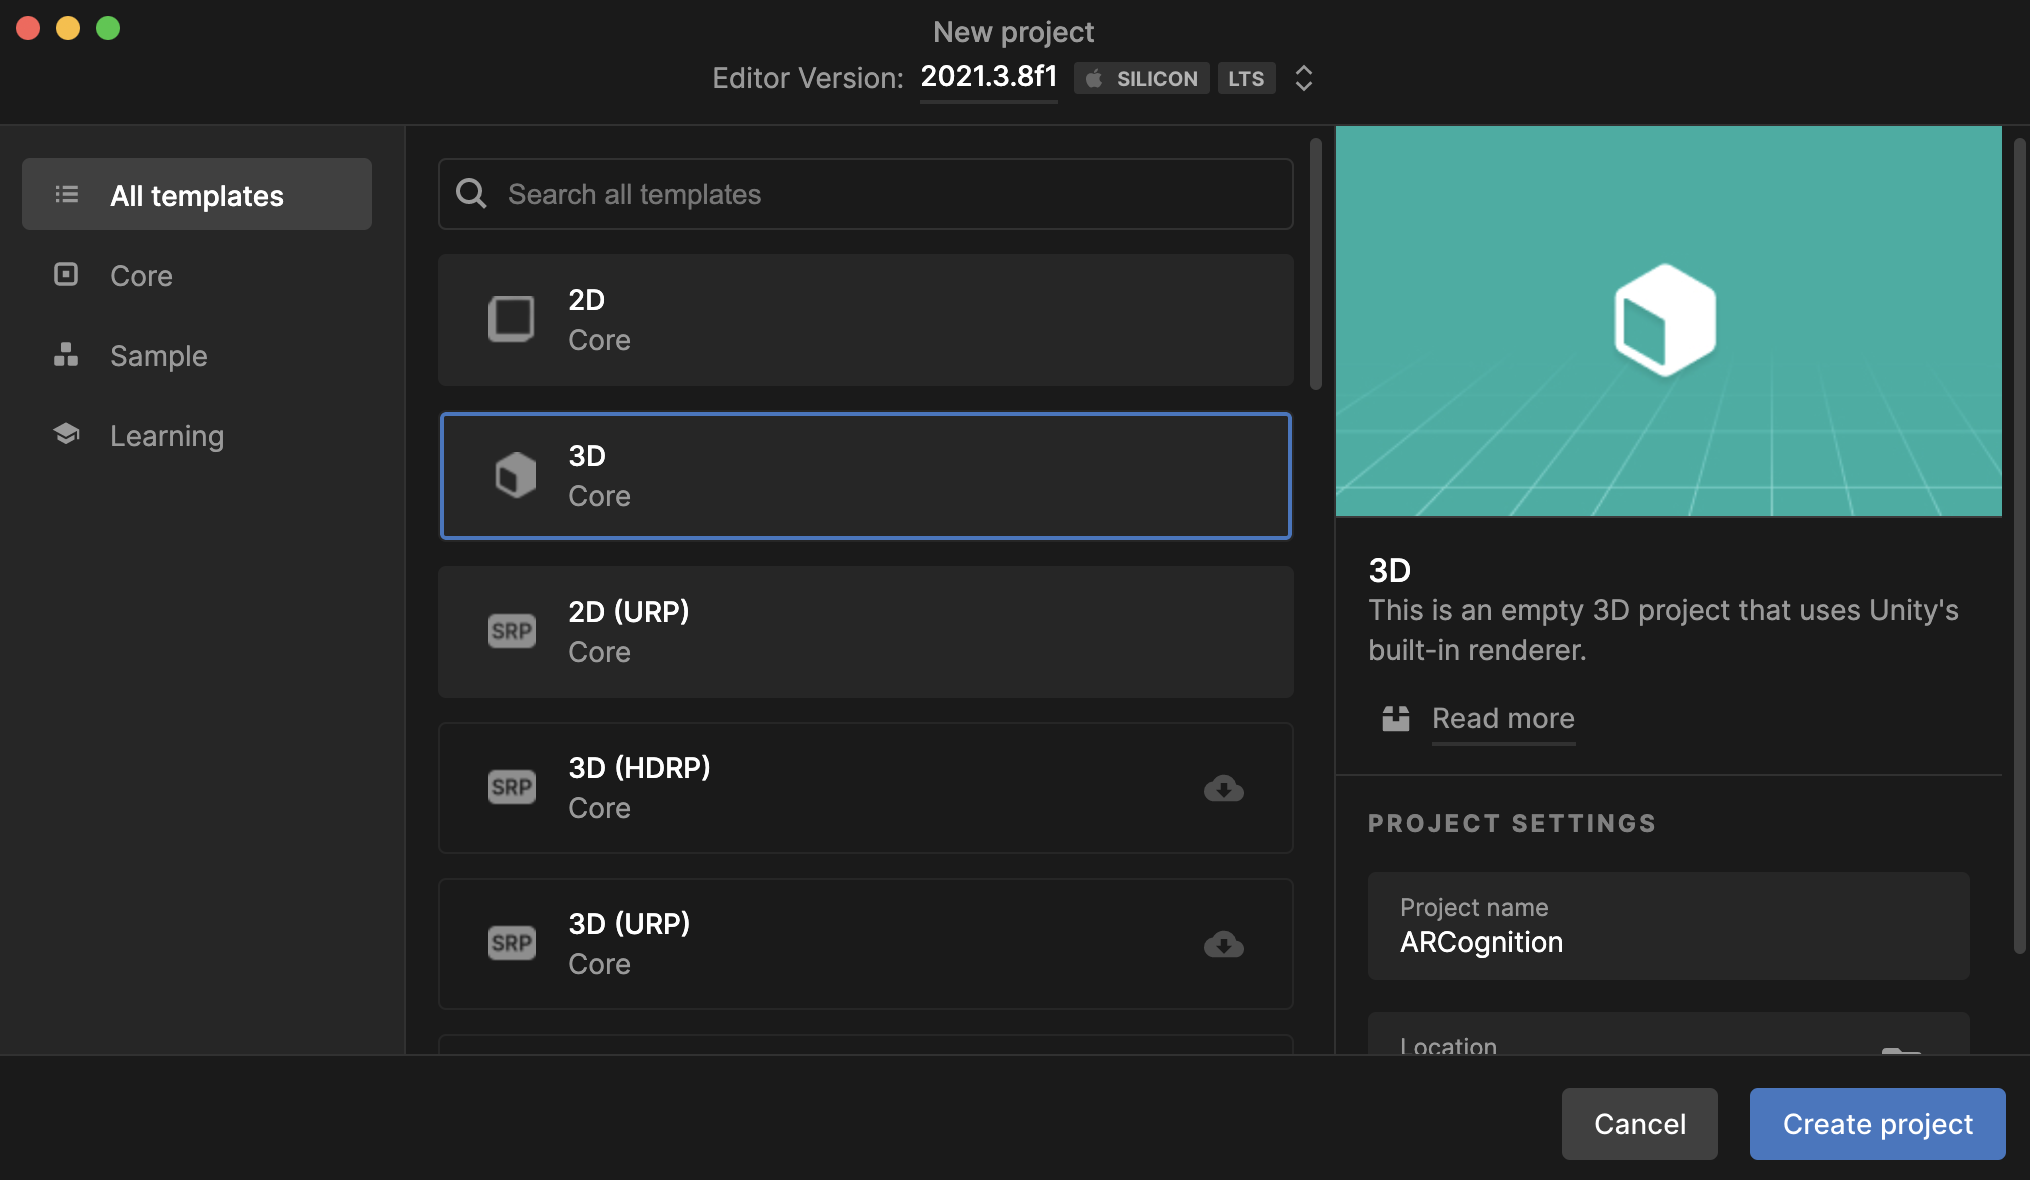
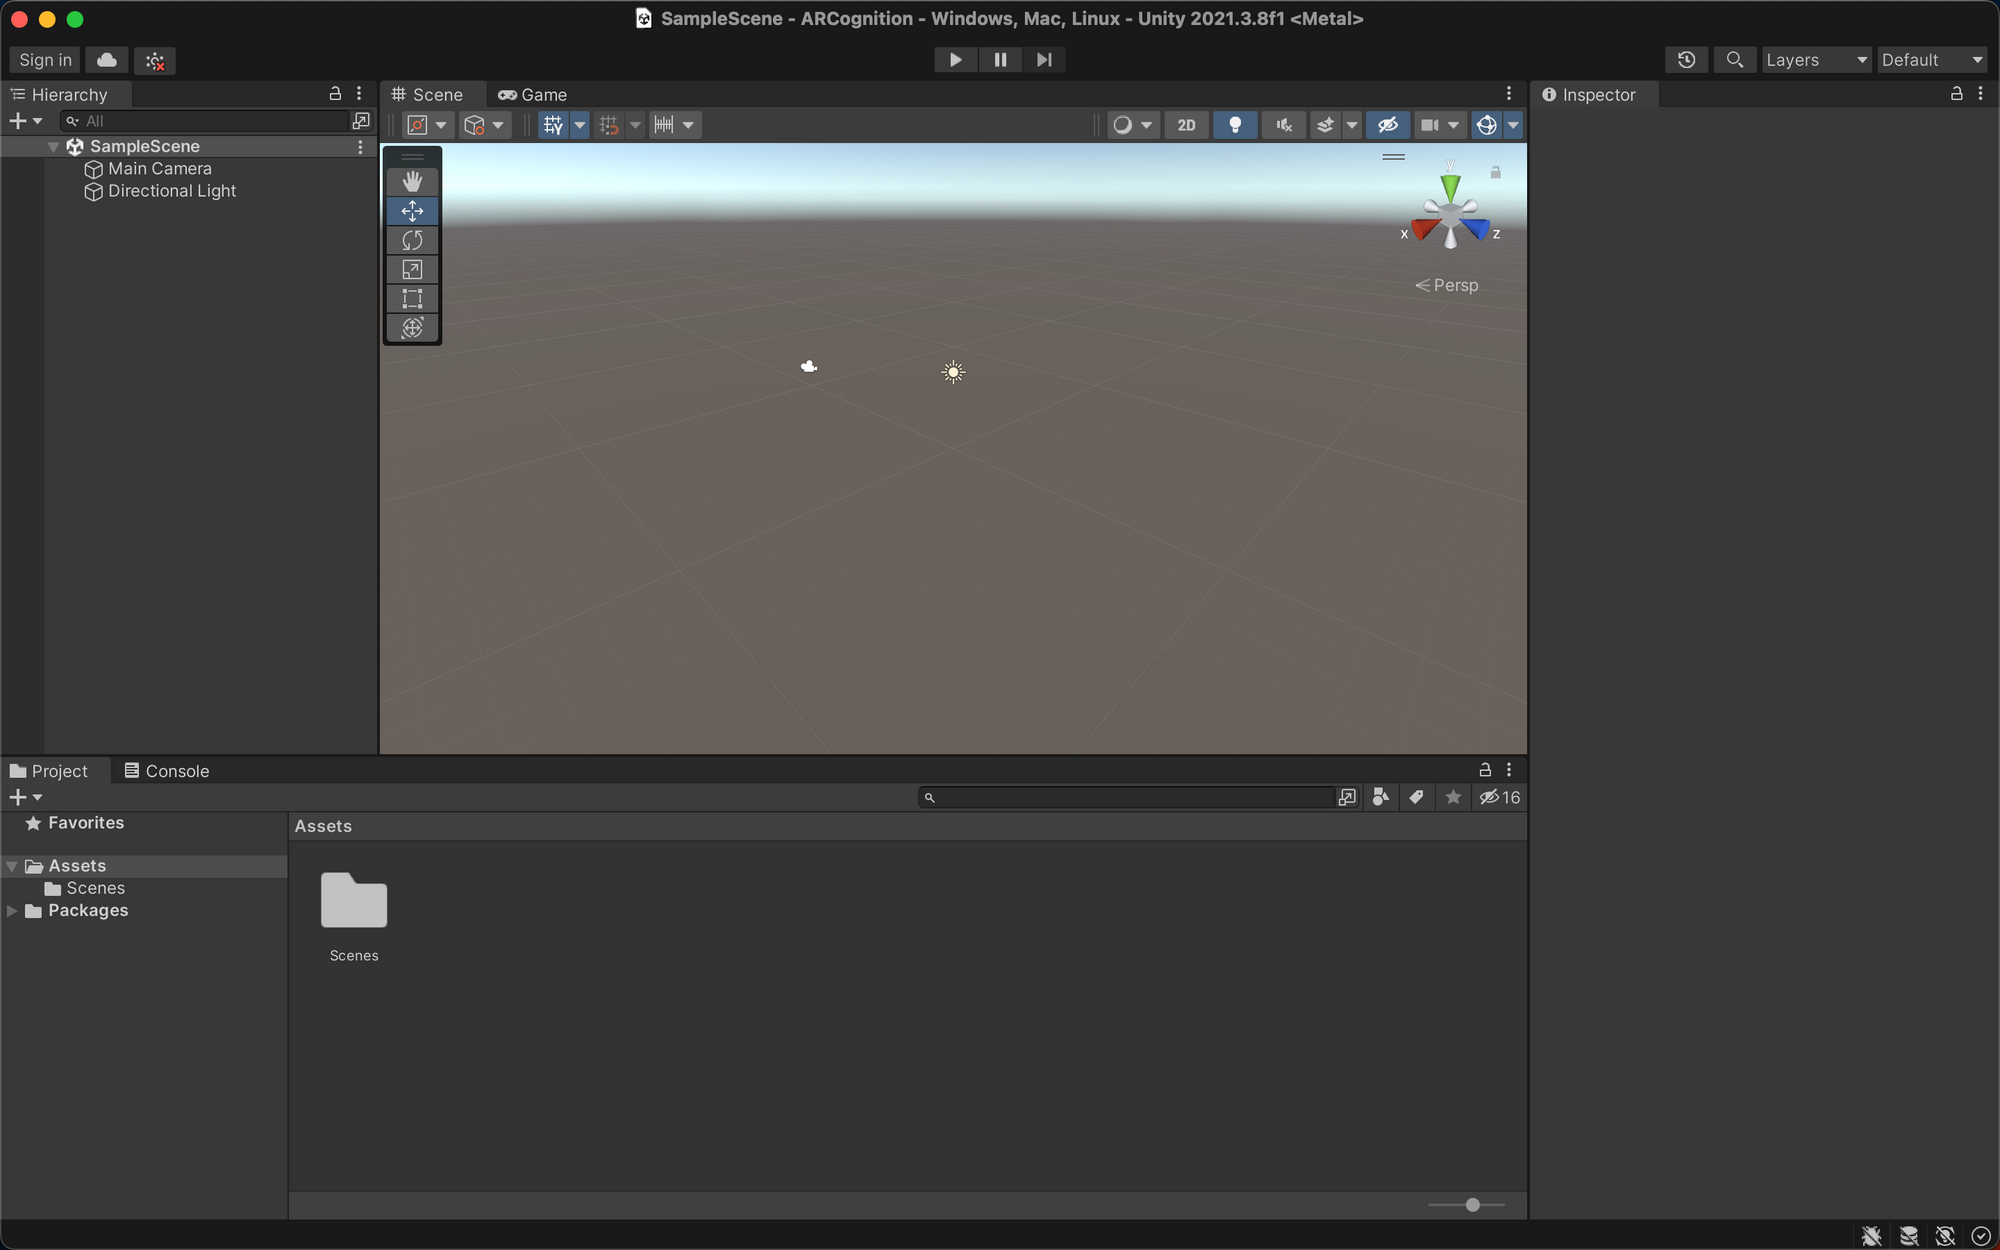
- It will take a few minutes, and you will get a new Unity 3D project.
Step 03: Importing Lightship ARDK packages to Unity
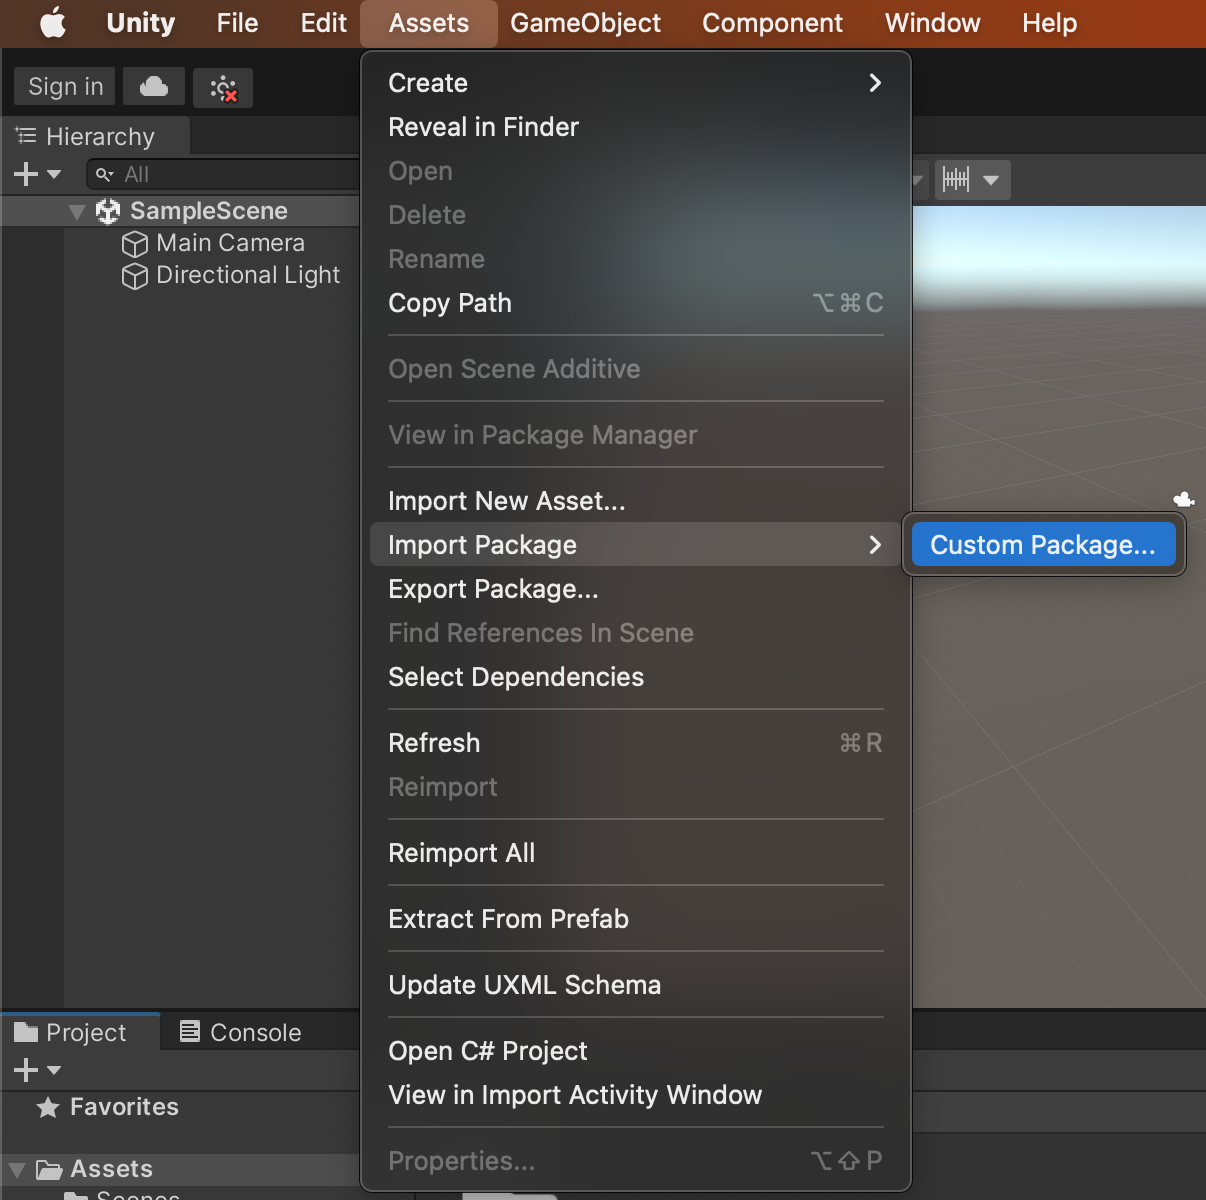
- Import ARDK files to Unity via Assets --> Import Package --> Custom Package
- Make sure to select all the downloaded files following the above process starting with
ardk-x.x.x.unitypackage.
Step 04: Integrate Lightship ARDK Account with Unity Project
- Create an account on the Lightship Developer Platform.
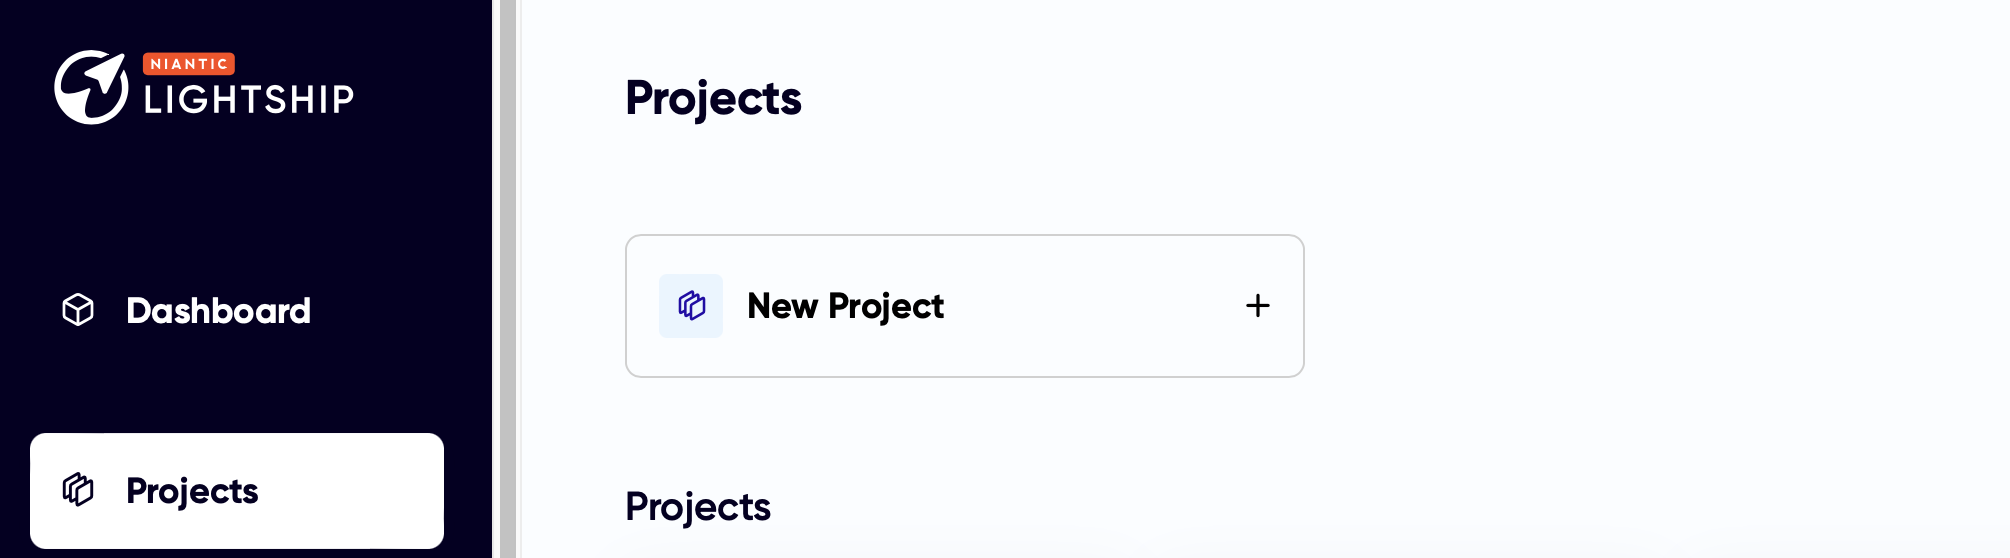
- Login to your Lightship developer account, go to the Projects section and click on the "New Project" button to create a new project.
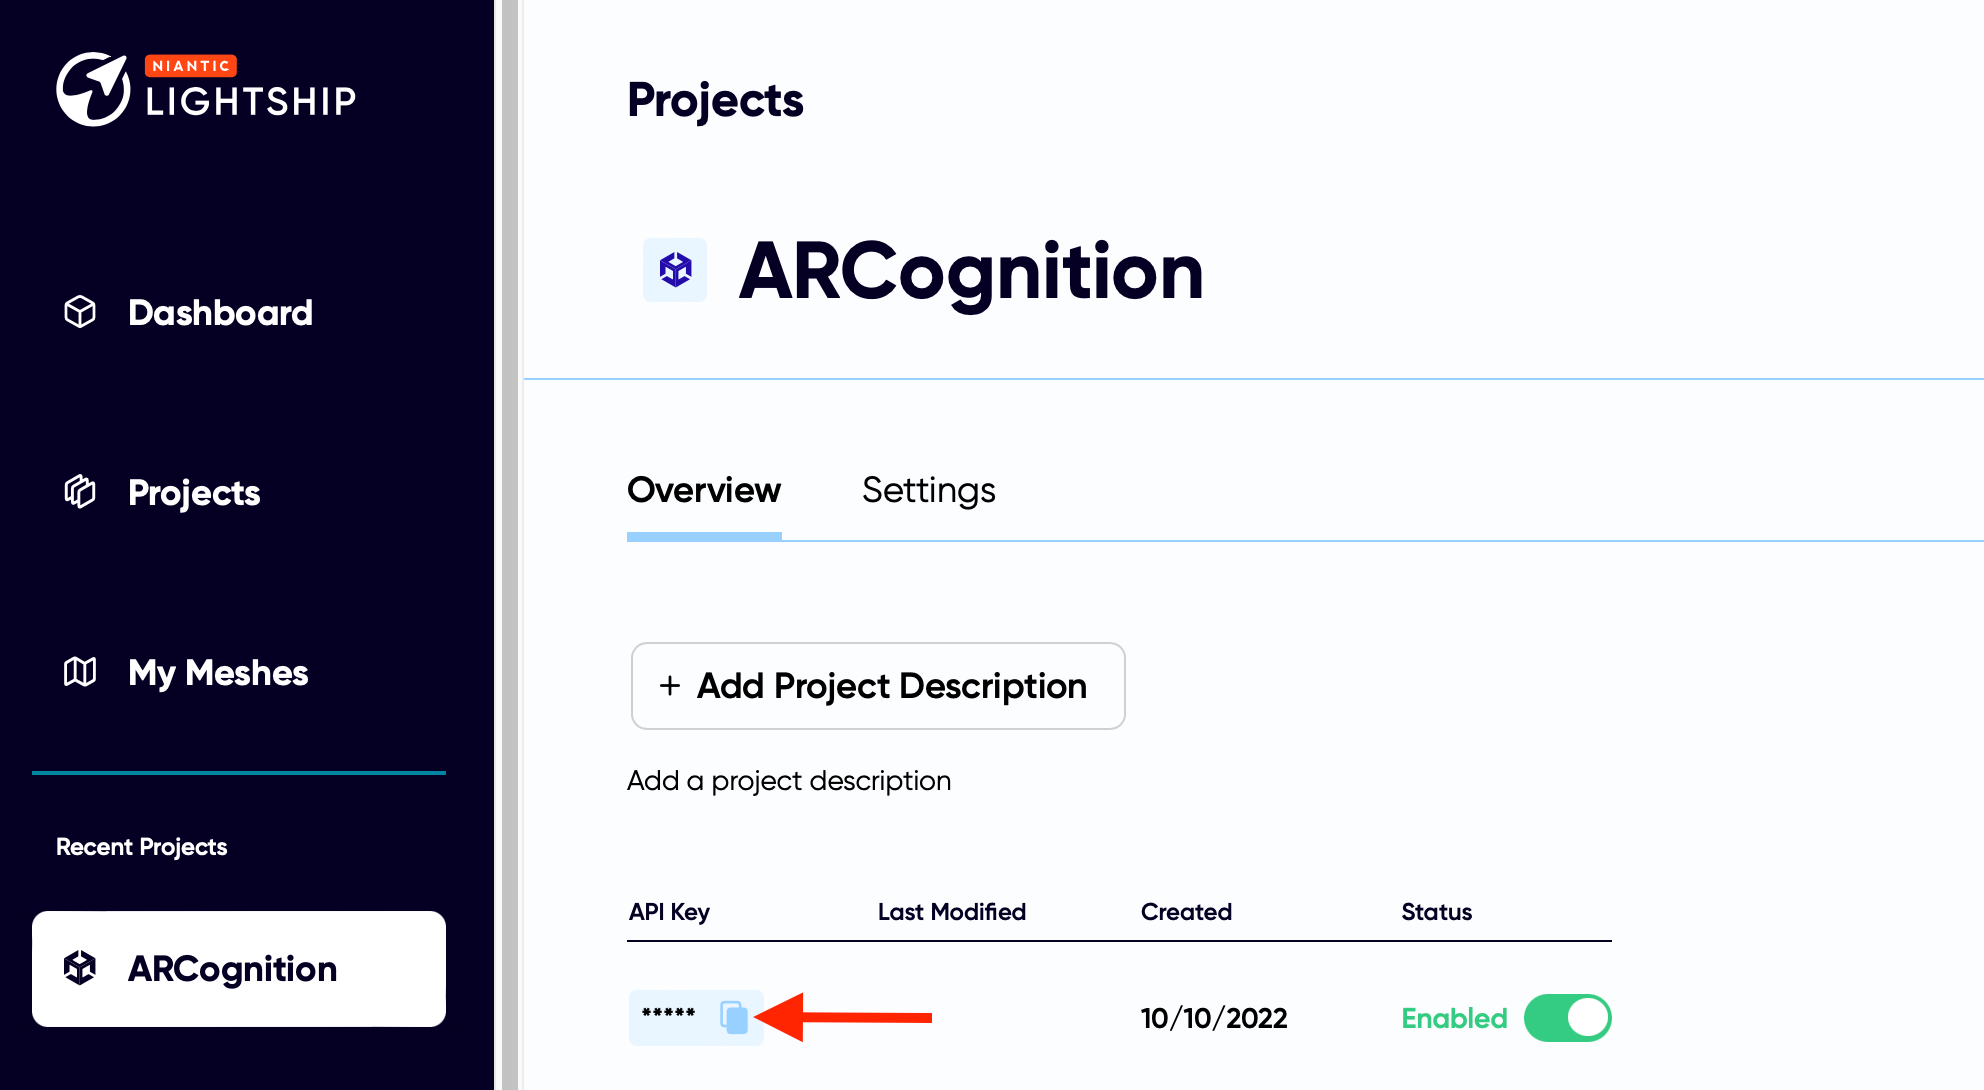
- You can rename your newly created project and create a new API key by clicking the "+Create New Key" button. Then you need to copy your newly created API key by clicking the Copy button.
- Then open Configuration Helper Window through Lightship --> Lightship Hub --> Configuration Helper Window.
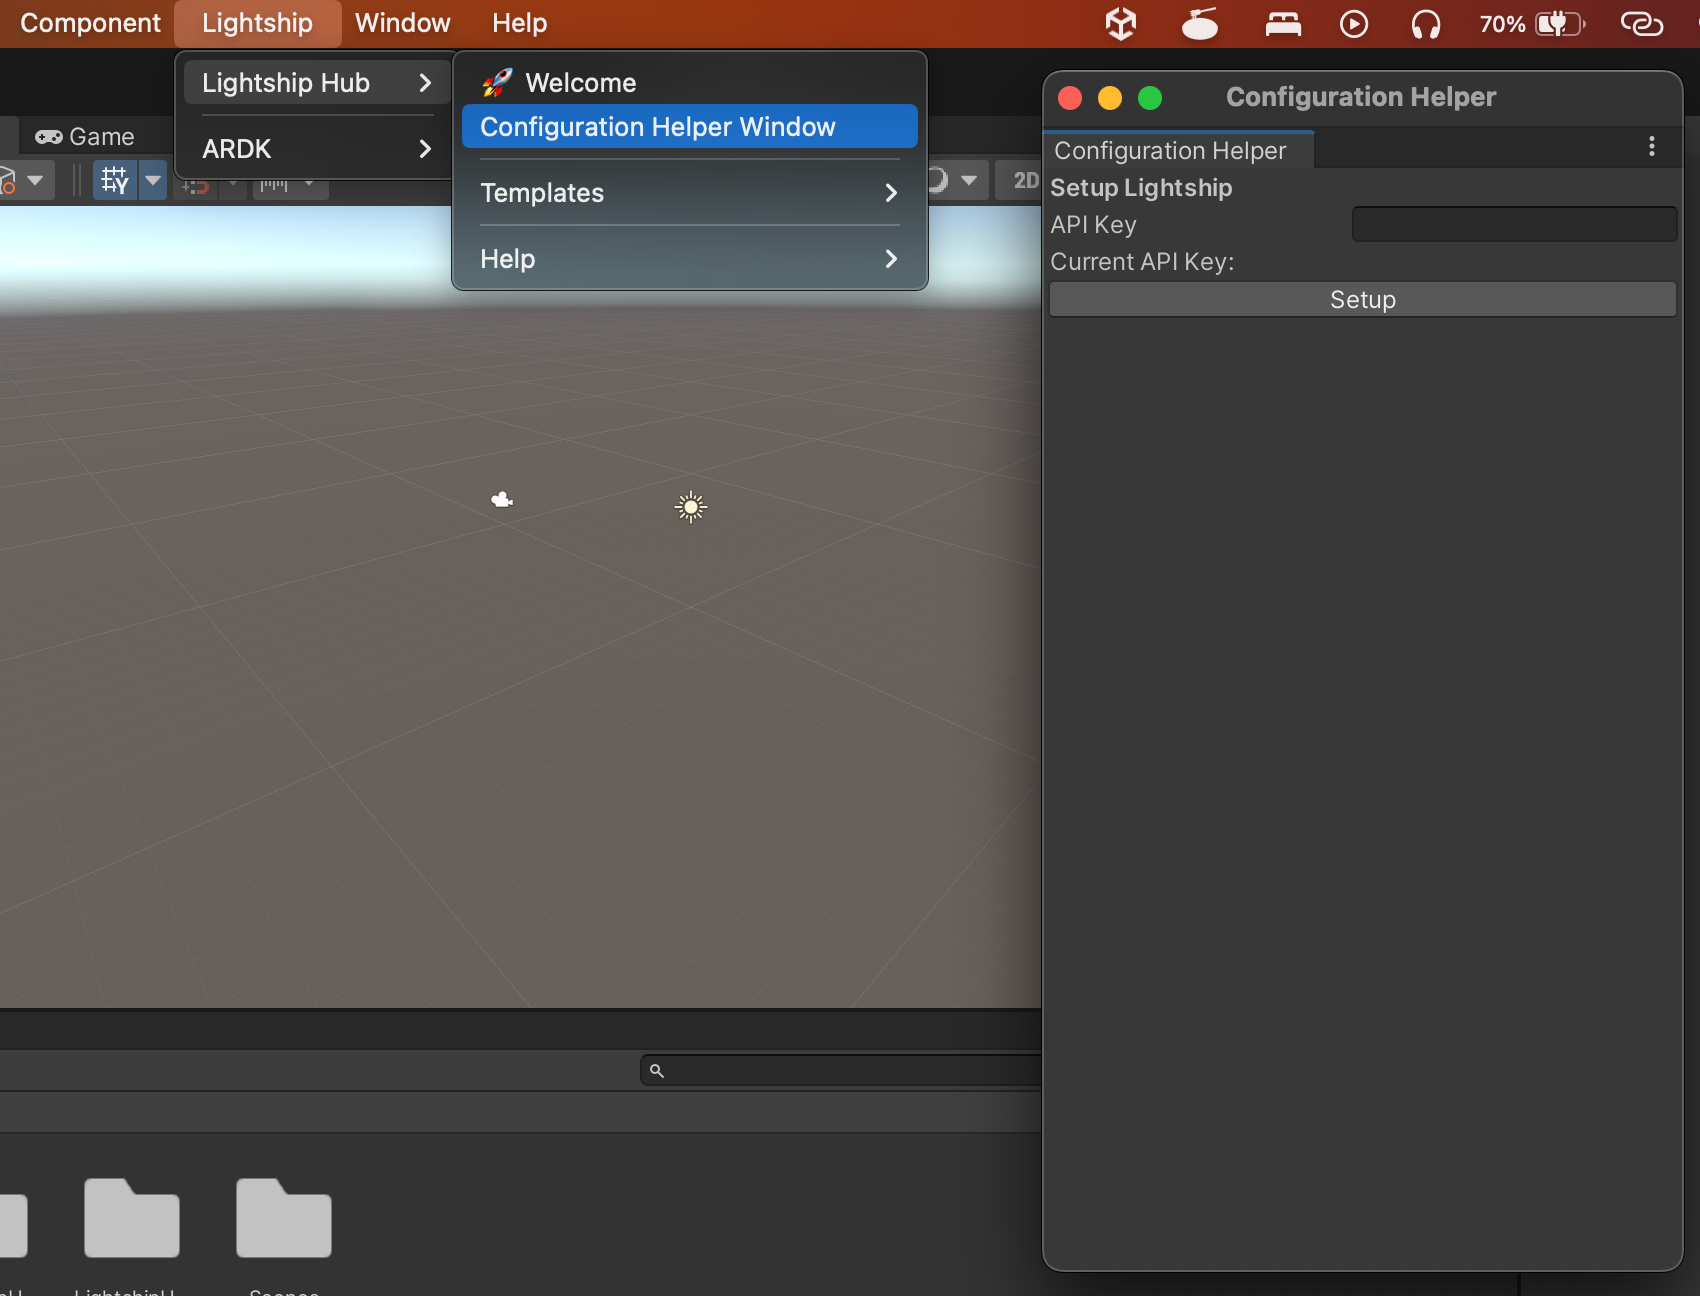
- Paste the previously copied API key to the "API Key" input box and click the "Setup" button.
- You may get a popup message to confirm the API key submission is successful. Now you may close the "Configuration Helper" window.
⚠️
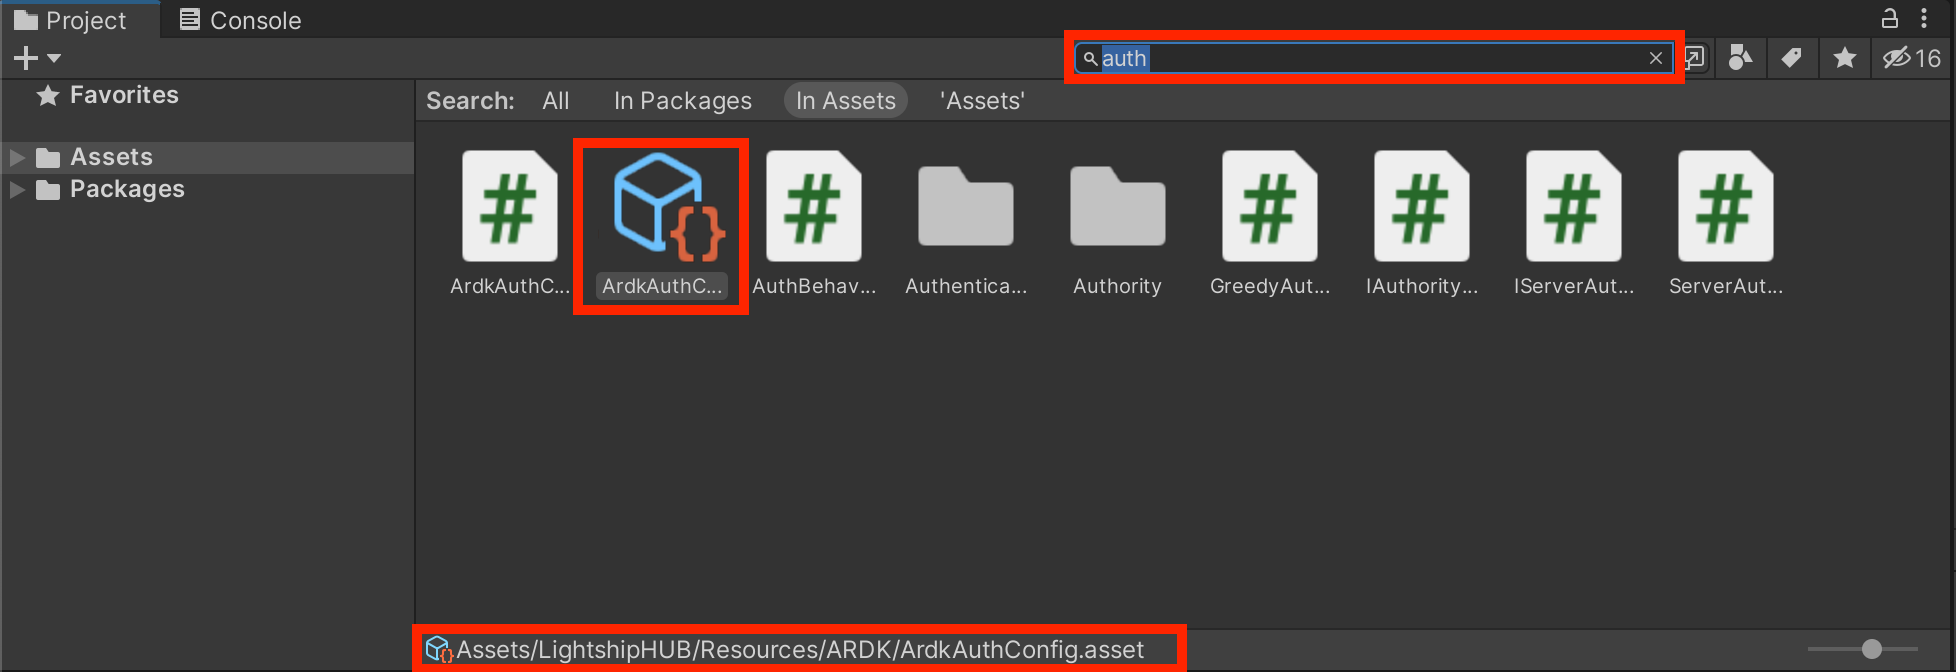
Make sure you have only one ArdkAuthCongig.asset in your Project. You can search and verify it. If multiple ArdkAuthConfig.asset files are found, delete the duplicates and keep only one (which is located at Assets/LightshipHUB/Resources/ARDK path.)
Step 05: Use Lightship Templates
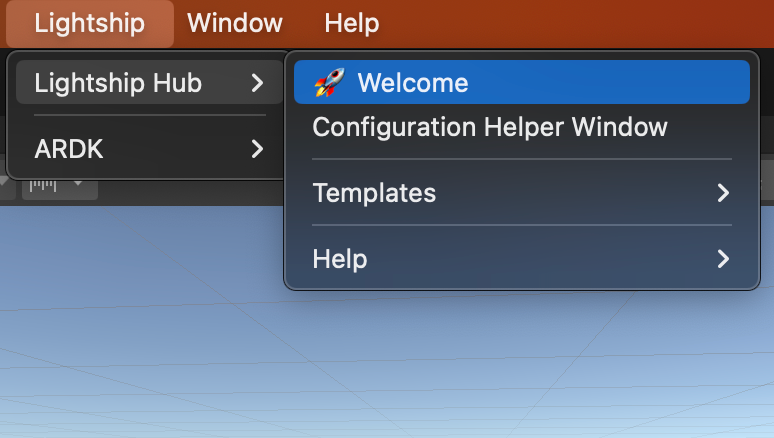
- Open Lightship Hub through Lightship --> Lightship Hub --> Welcome
- You will get get "Lightship Templates Gallery" window.
- These pre-made AR applications include various AR functionalities ranging from basic AR object placement to Shared AR and Visual Positioning System (VPS) based experiences.
- As a beginner, you can use one of these templates and customize one to get familiar with AR.
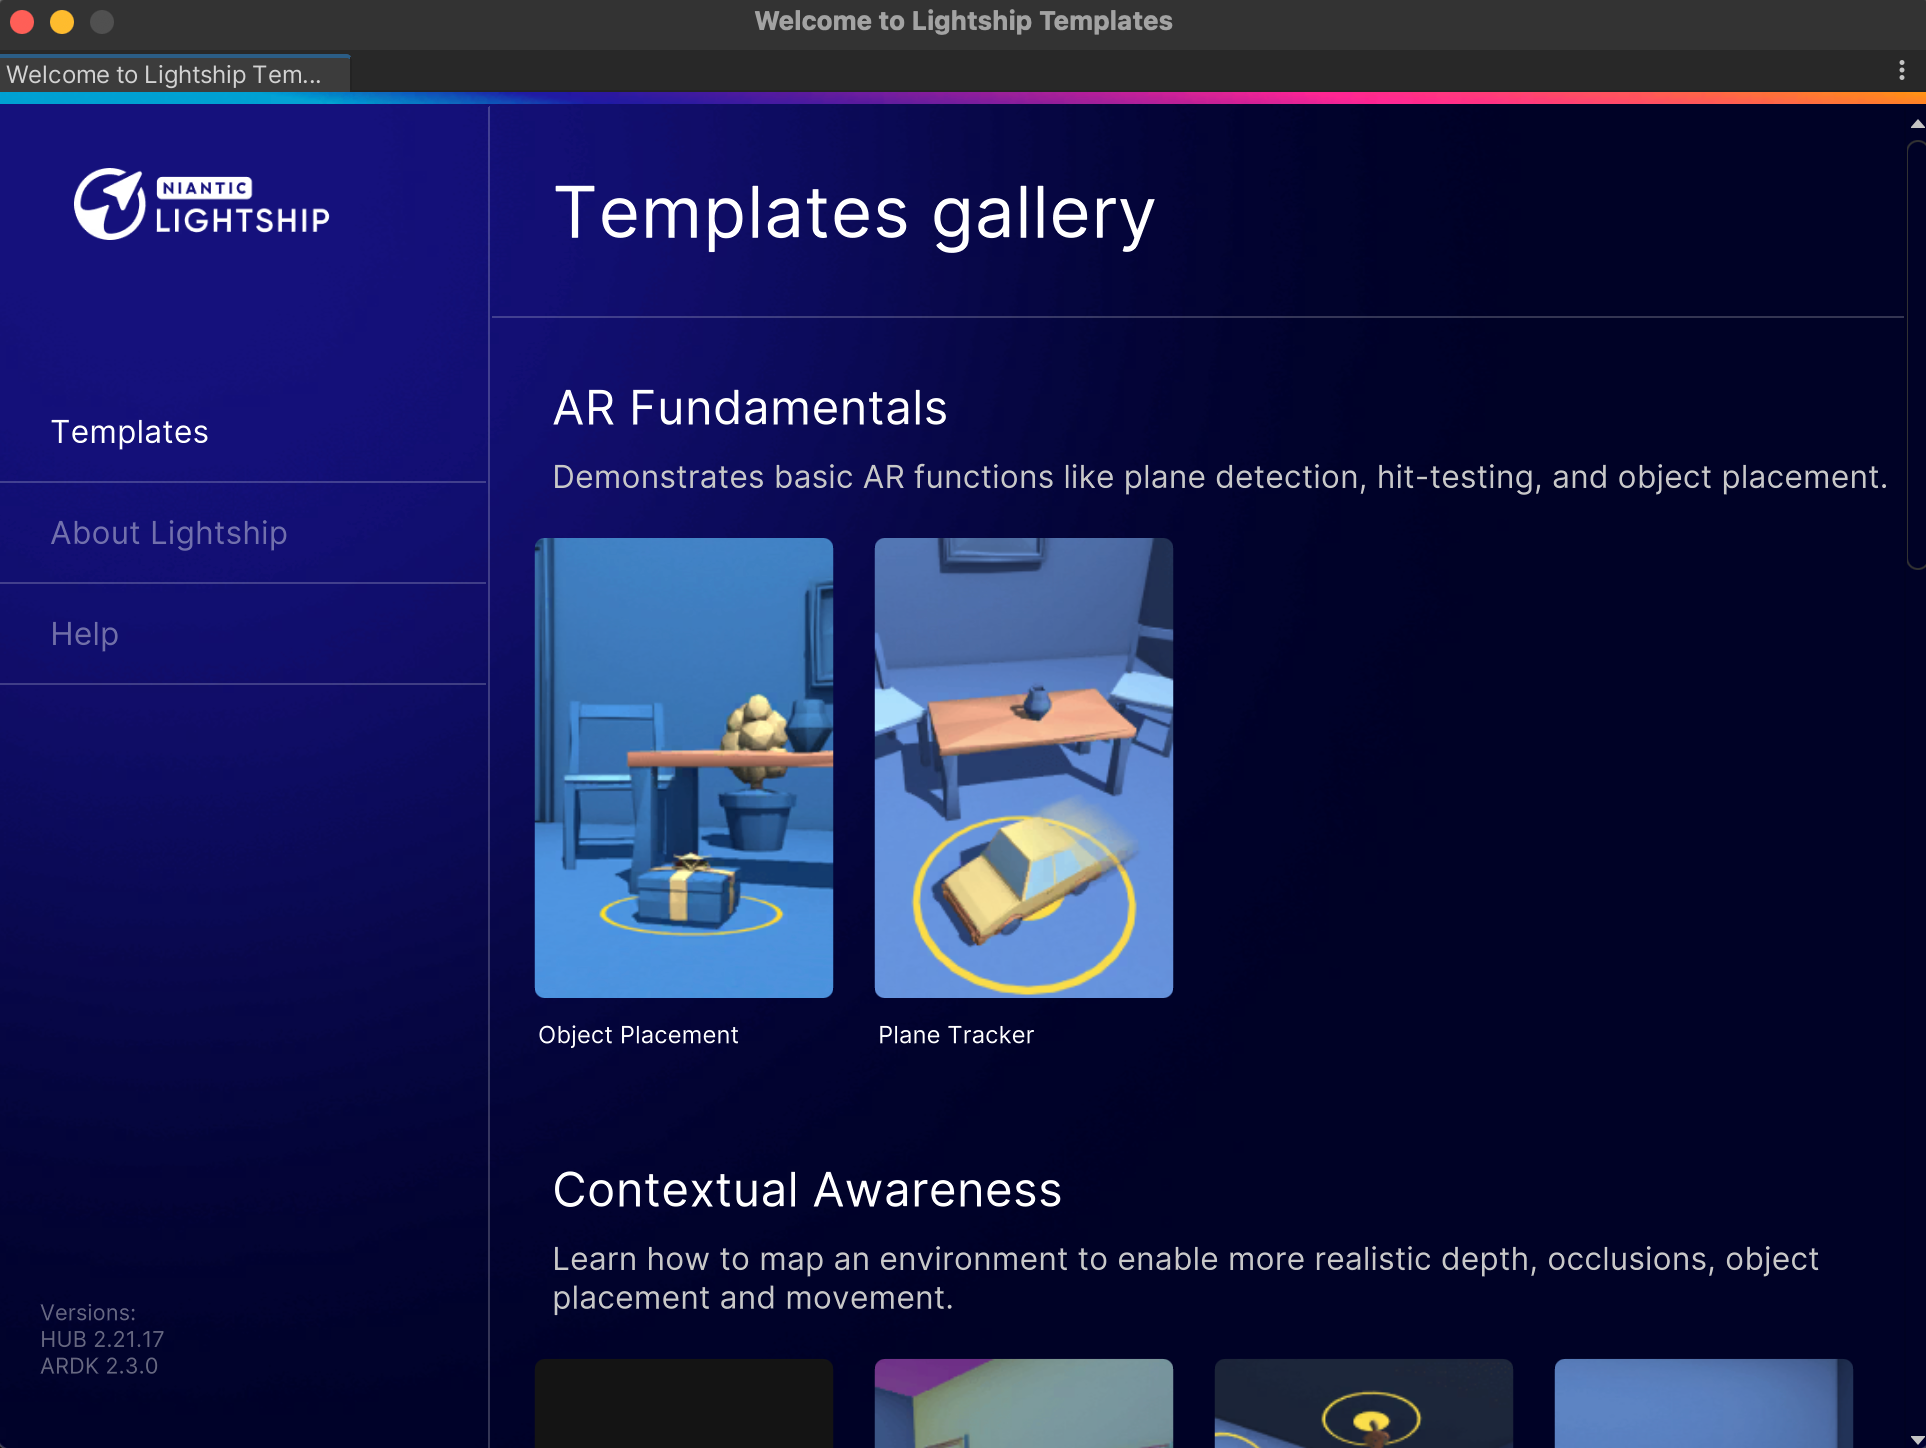
- Let's pick the "Object Placement" template. Once you click on it, your Unity will be updated with all the project resources and configurations.
Step 06: Use Mock Environment and Test the AR App
- Now you have an AR app ready to test. But first, let's open Virtual Studio and load a mock environment so you can test your AR app within the Unity editor.
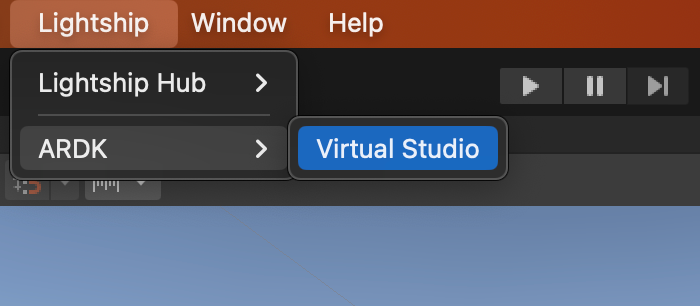
- Go to Lightship --> ARDK --> Virtual Studio
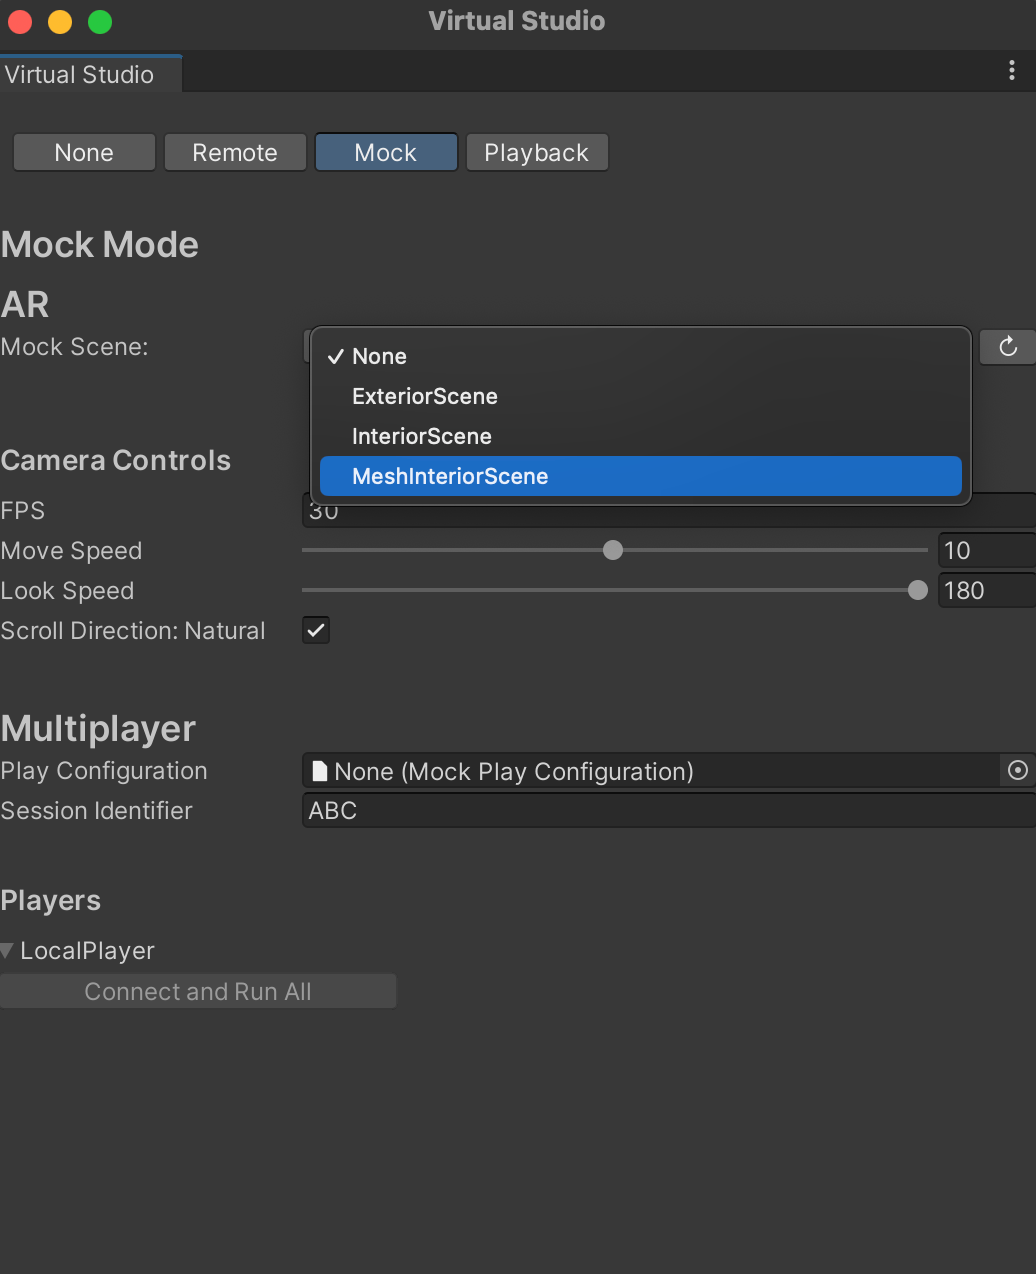
- You will get the Lightship Virtual Studio as below. Next, go to the "Mock" tab and select "MeshInteriorScene" from the Mock Scene drop-down.
- Now you can run your AR app by clicking the run button on top of your Unity editor.

- You can use the mouse and WASD keys to navigate the mock environment and place the AR object on horizontal surfaces.
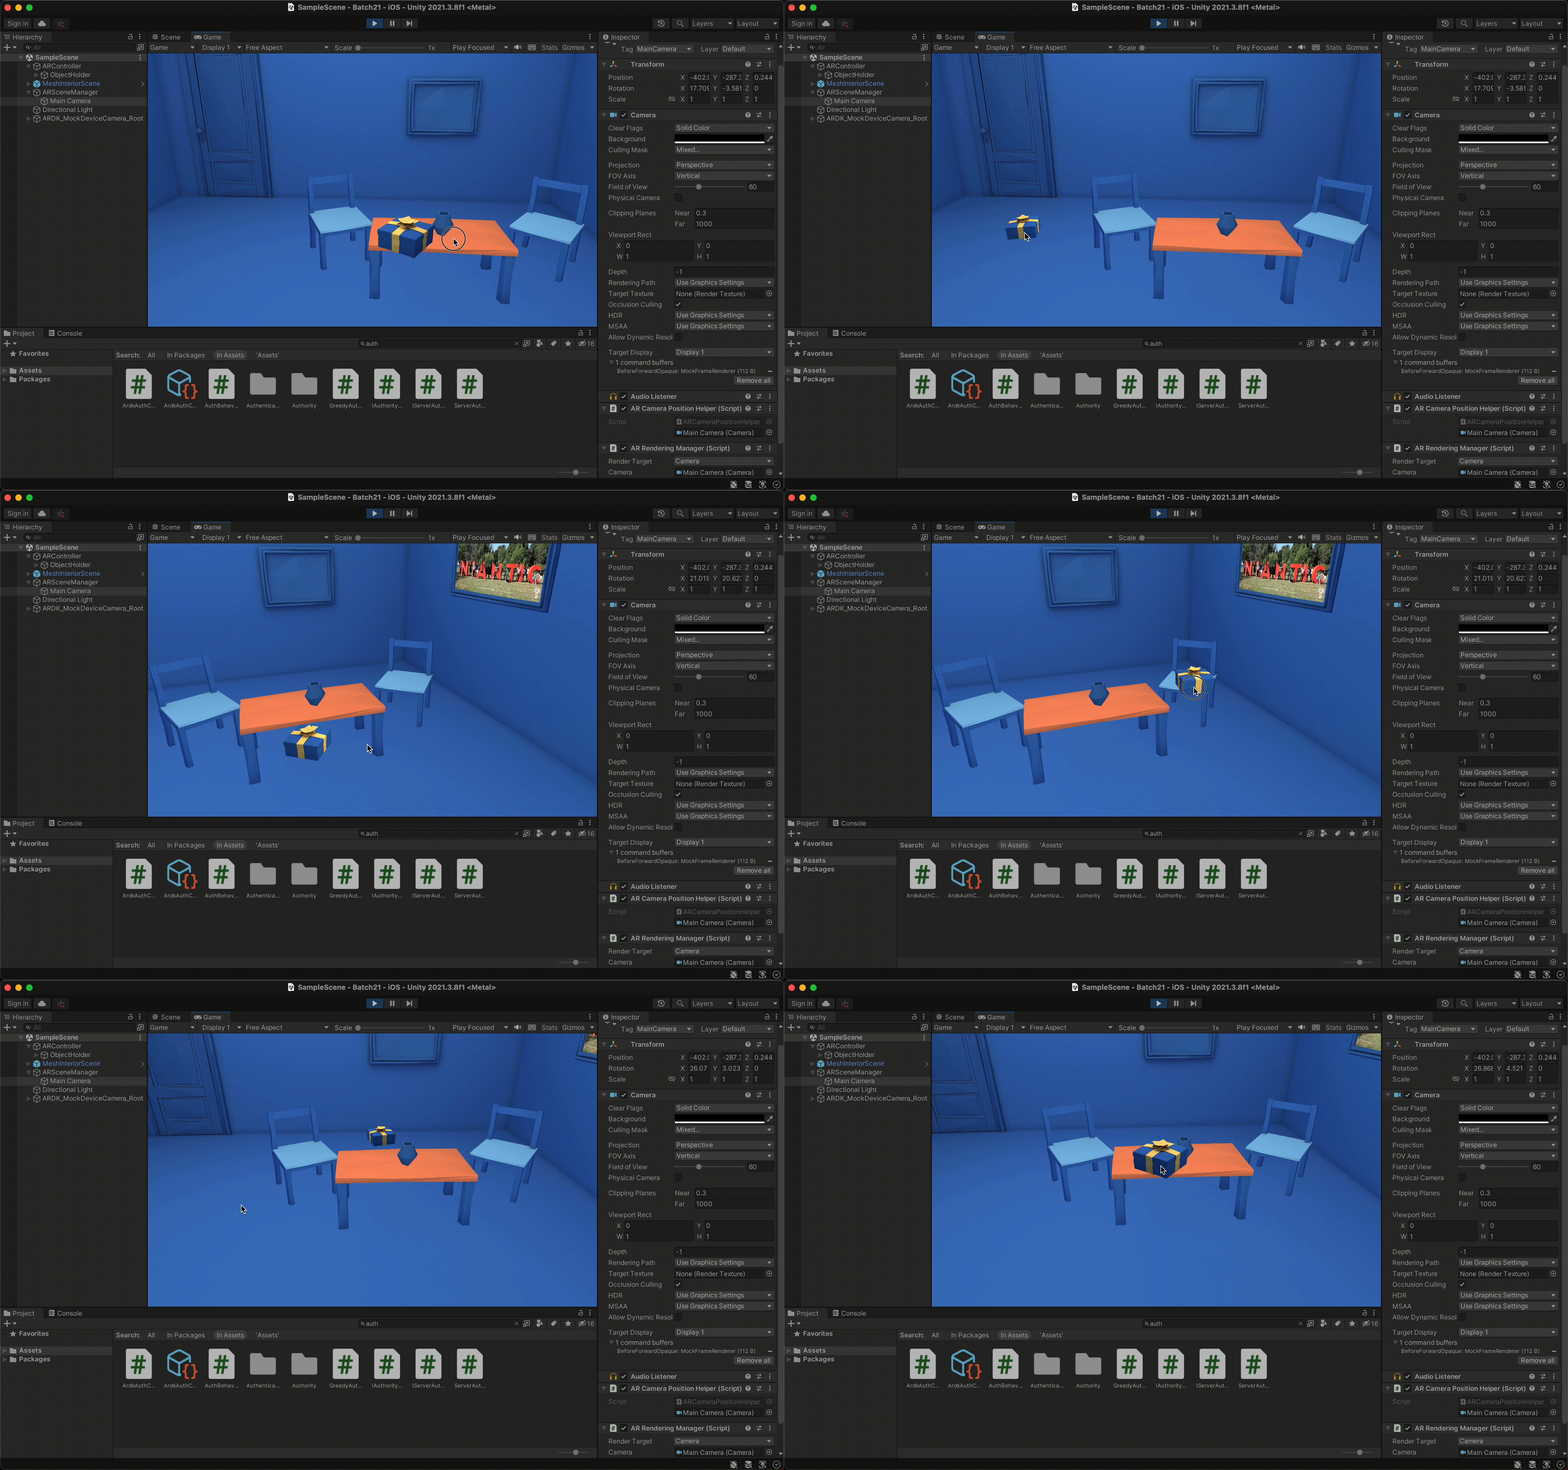
- Now we have a simple AR app ready to deploy to a mobile device and test in the real world.
Step 07: Building the AR App for Android/iOS
- Go to File --> Build Settings...
- Ensure the current scene is listed under "Scenes In Build." If you do not see any scene, you can click on the "Add Open Scenes" button and add your current scene.
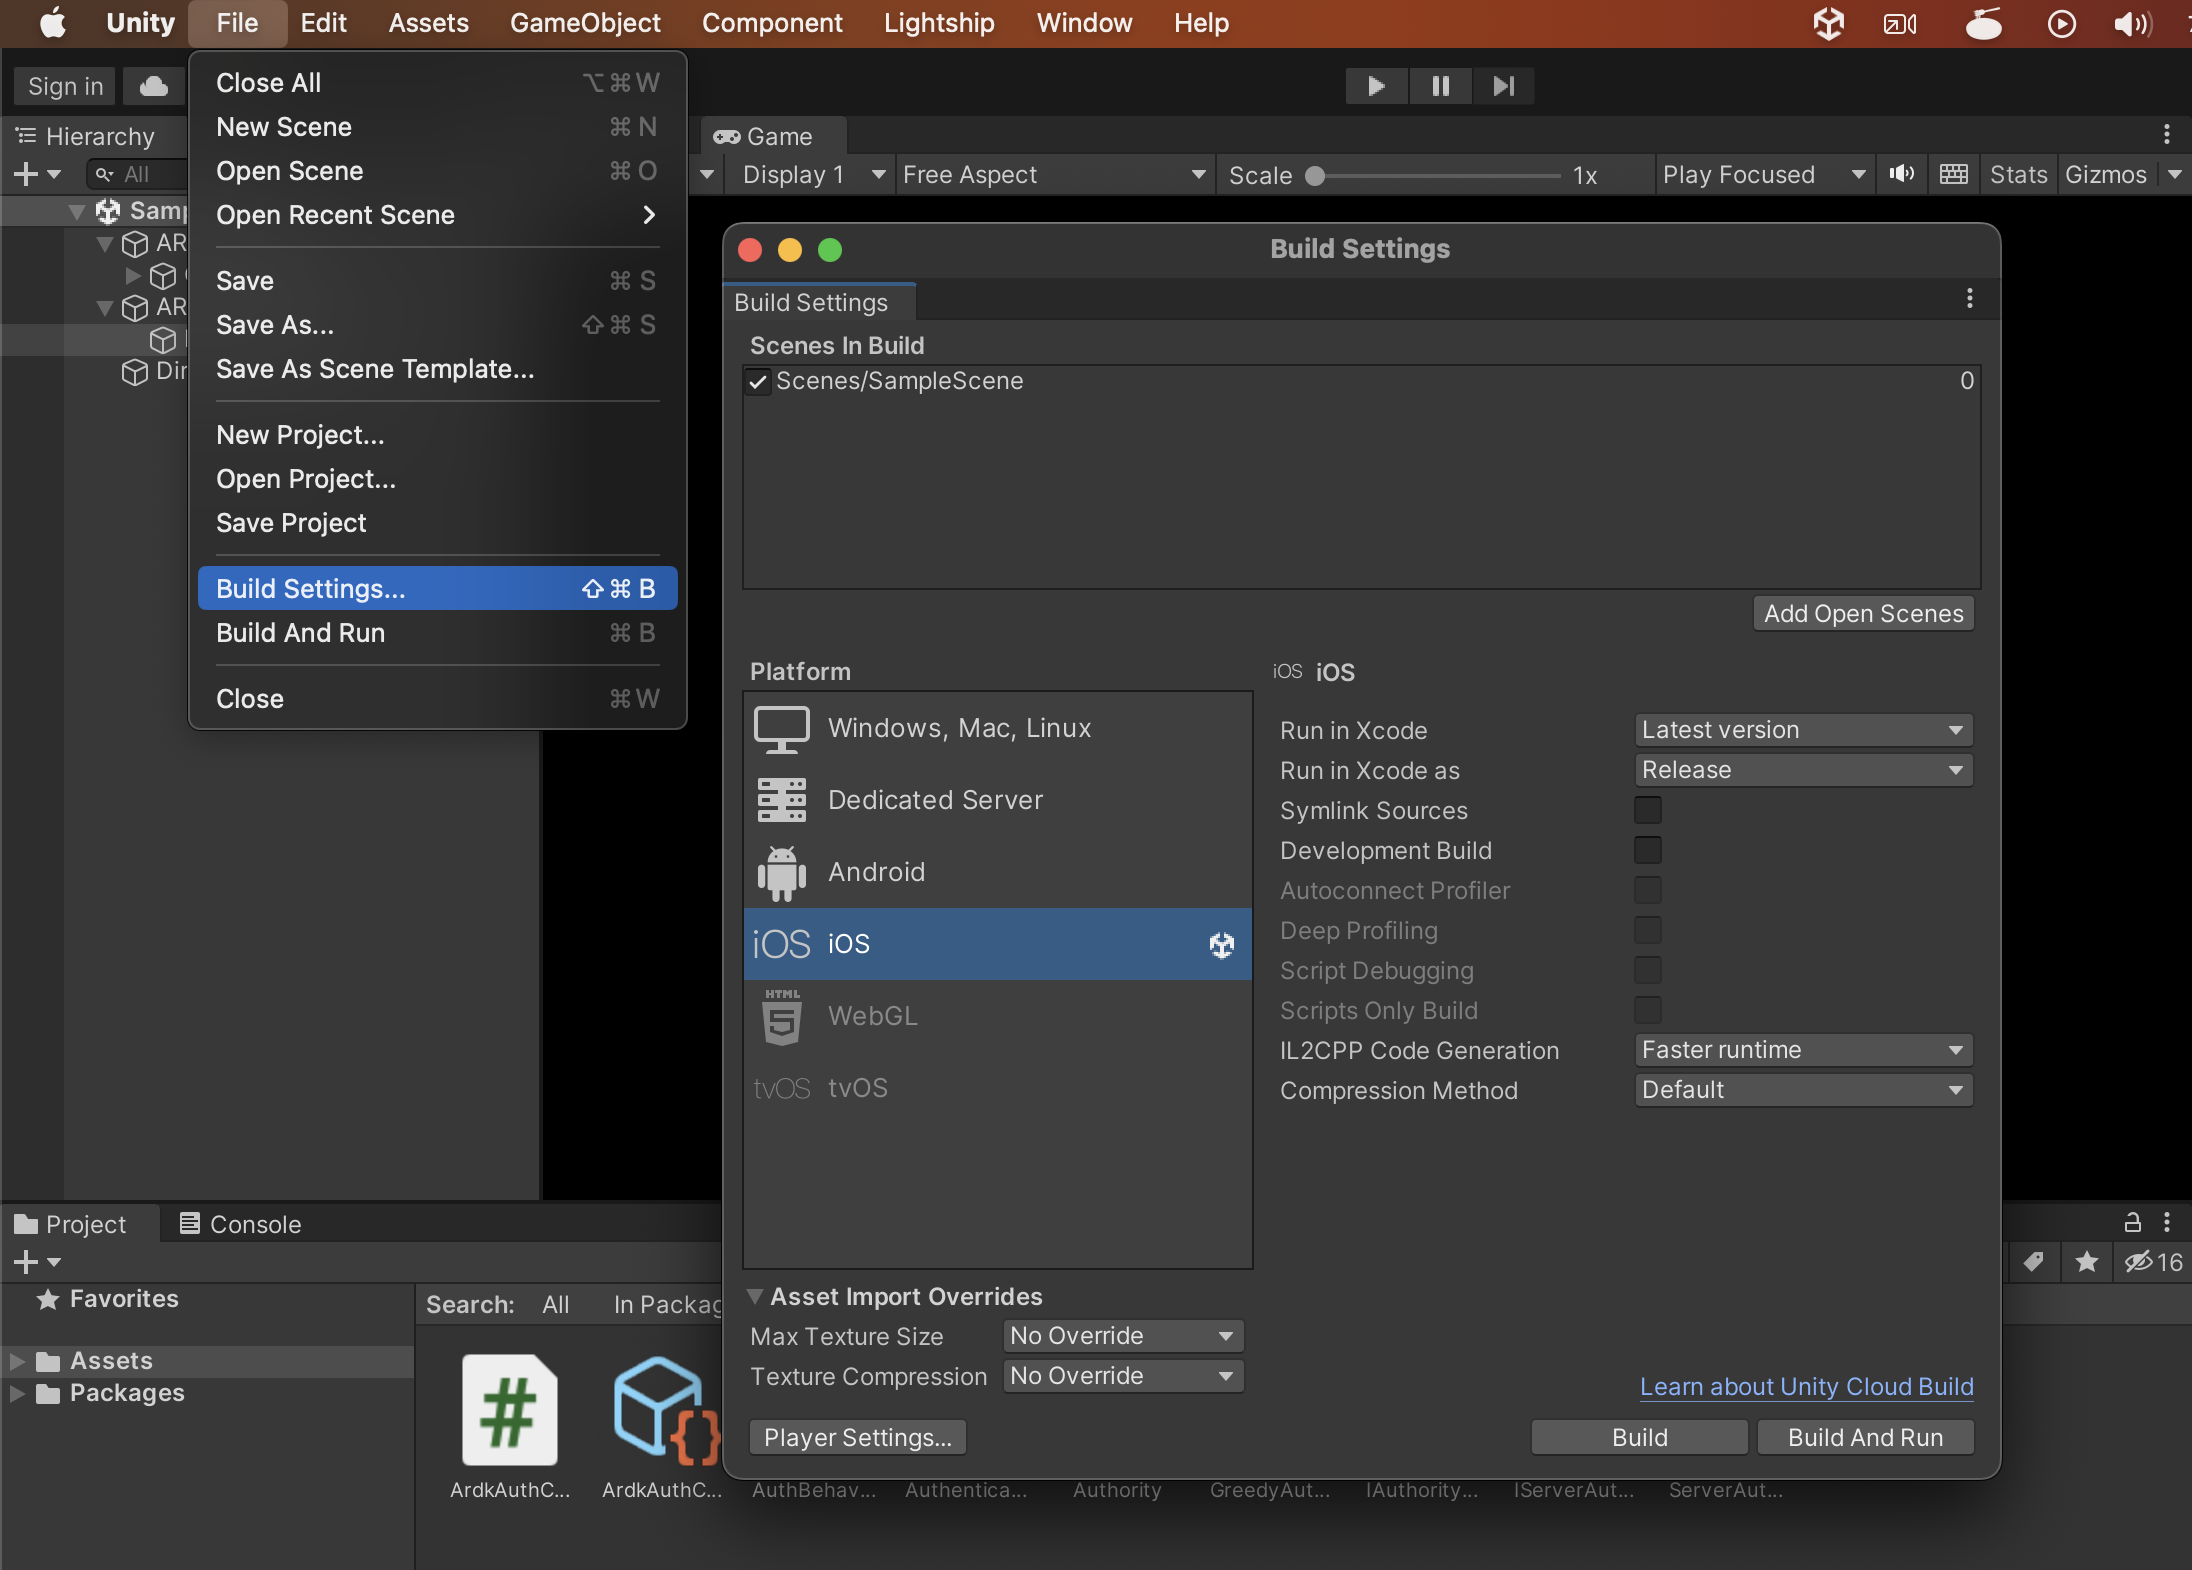
- Select your operating system under "Platform." If your platform is disabled, you have not set up the development environment correctly. You may need to install Android or iOS build support tools.
- Refer below resource to set up the Development and Runtime environment for iOS.
Development and Runtime Requirements of ARDK — Niantic Lightship Augmented Reality Developer Kit release-2.3 documentation

- Refer below resource to set up the Development and Runtime environment for Android.
Development and Runtime Requirements of ARDK — Niantic Lightship Augmented Reality Developer Kit release-2.3 documentation
- After selecting your desired platform, enable it by clicking the "Switch Platform" button at the bottom of the "Build Settings" window.
- Depending on your platform, you need to configure some build settings.
- For iOS: https://lightship.dev/docs/ardk/ardk_fundamentals/building_ios.html
- For Android: https://lightship.dev/docs/ardk/ardk_fundamentals/building_ios.html
- Now you are ready to test your AR application on your device.
Step 08: Run AR Application on Your Mobile Phone
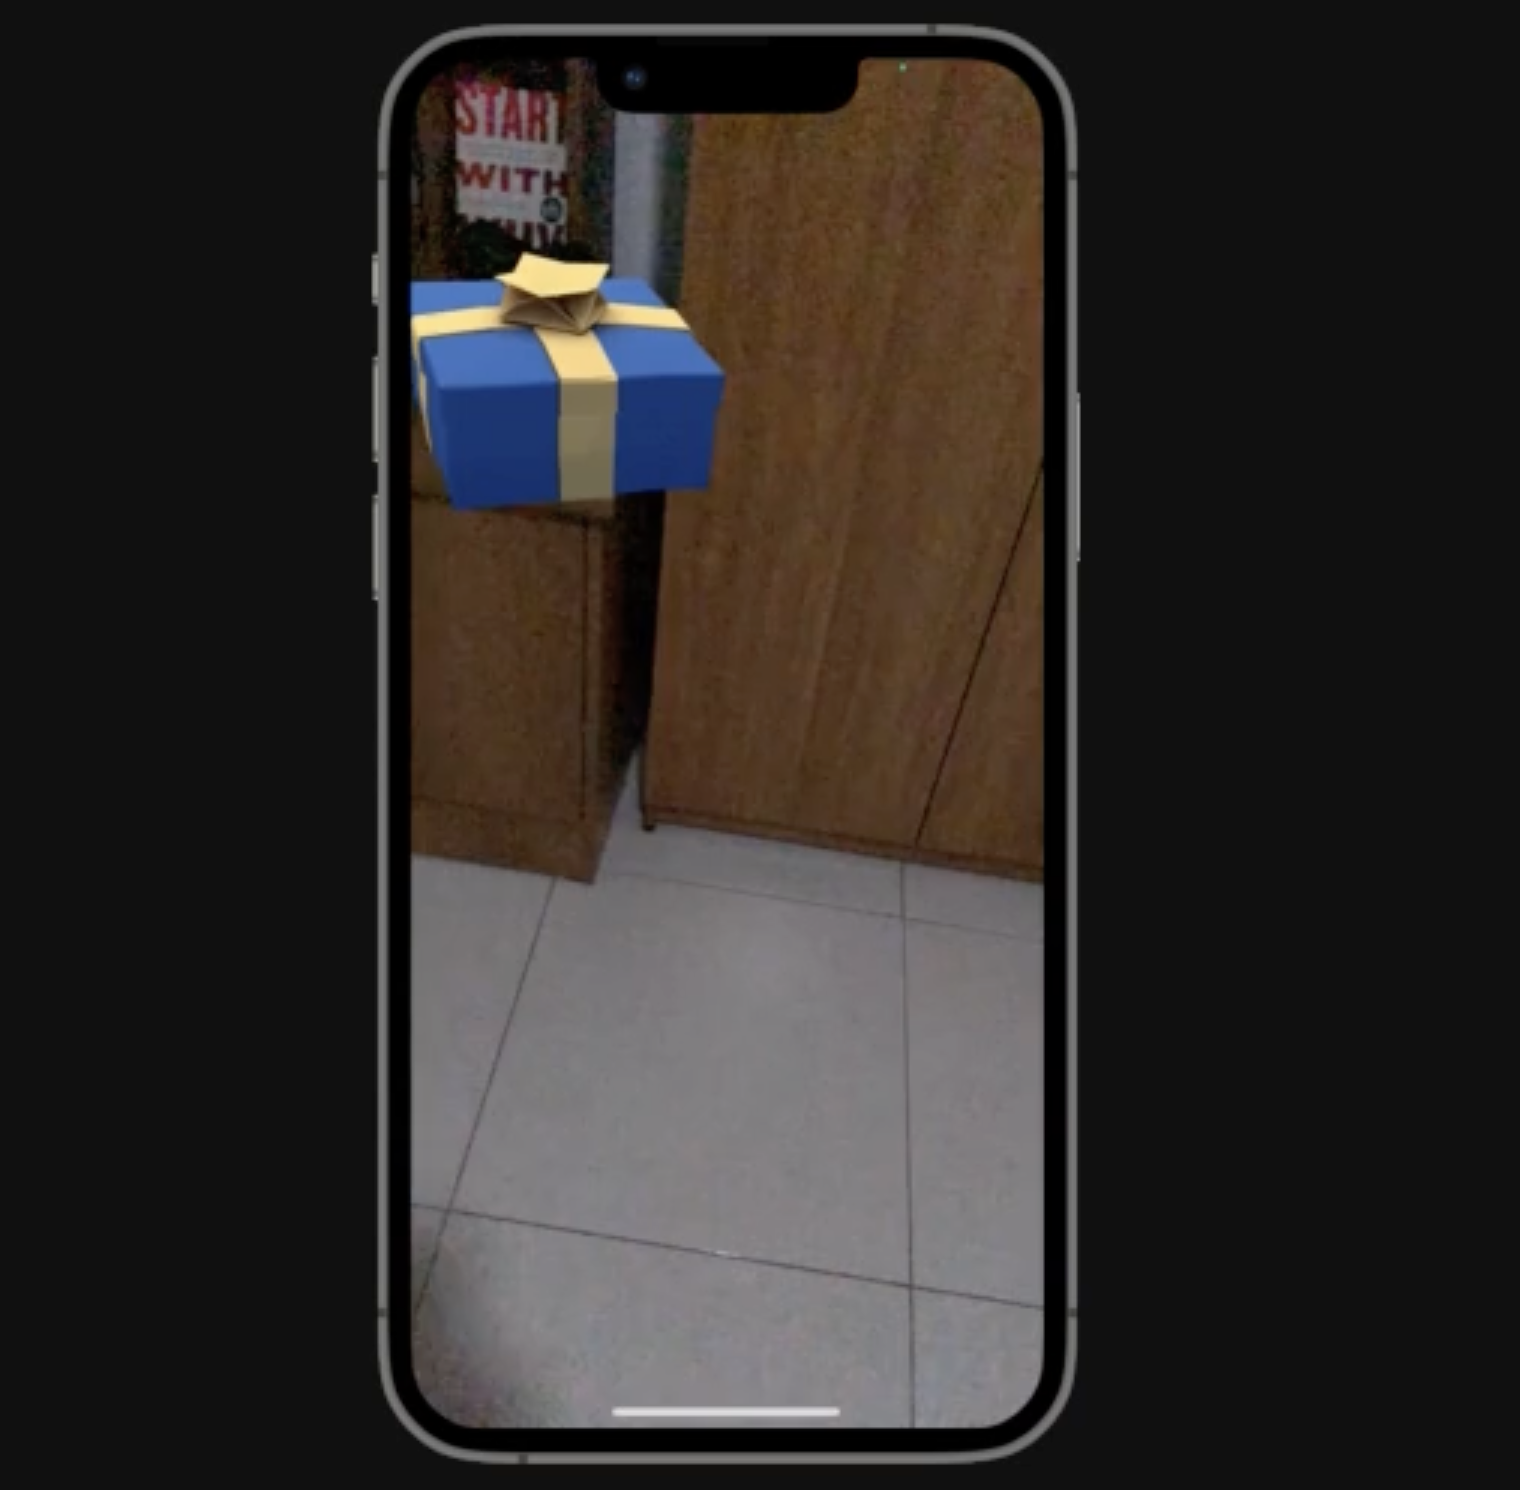
- When you run your app for the first time, the mobile OS will ask you to allow camera permissions. Click "Yes"/"Allow", and then you will be able to see your AR app in action.
Conclusion
This article provides a step-by-step guide showing how to design an augmented reality game/application using Niantic Lightship ARDK and Unity 3D. In addition, you can follow the Niantic Getting Started Guide for more details and video tutorials. As a next step, try to replace the Gift Box 3D object used in the template with another 3D object available. You can find many 3D objects for free via the Unity Asset Store.
In the next article, I hope to present another augmented reality game development project with more interactions and advanced AR concepts like occlusion and semantic segmentation.